


Sewing Machine Repair Guy
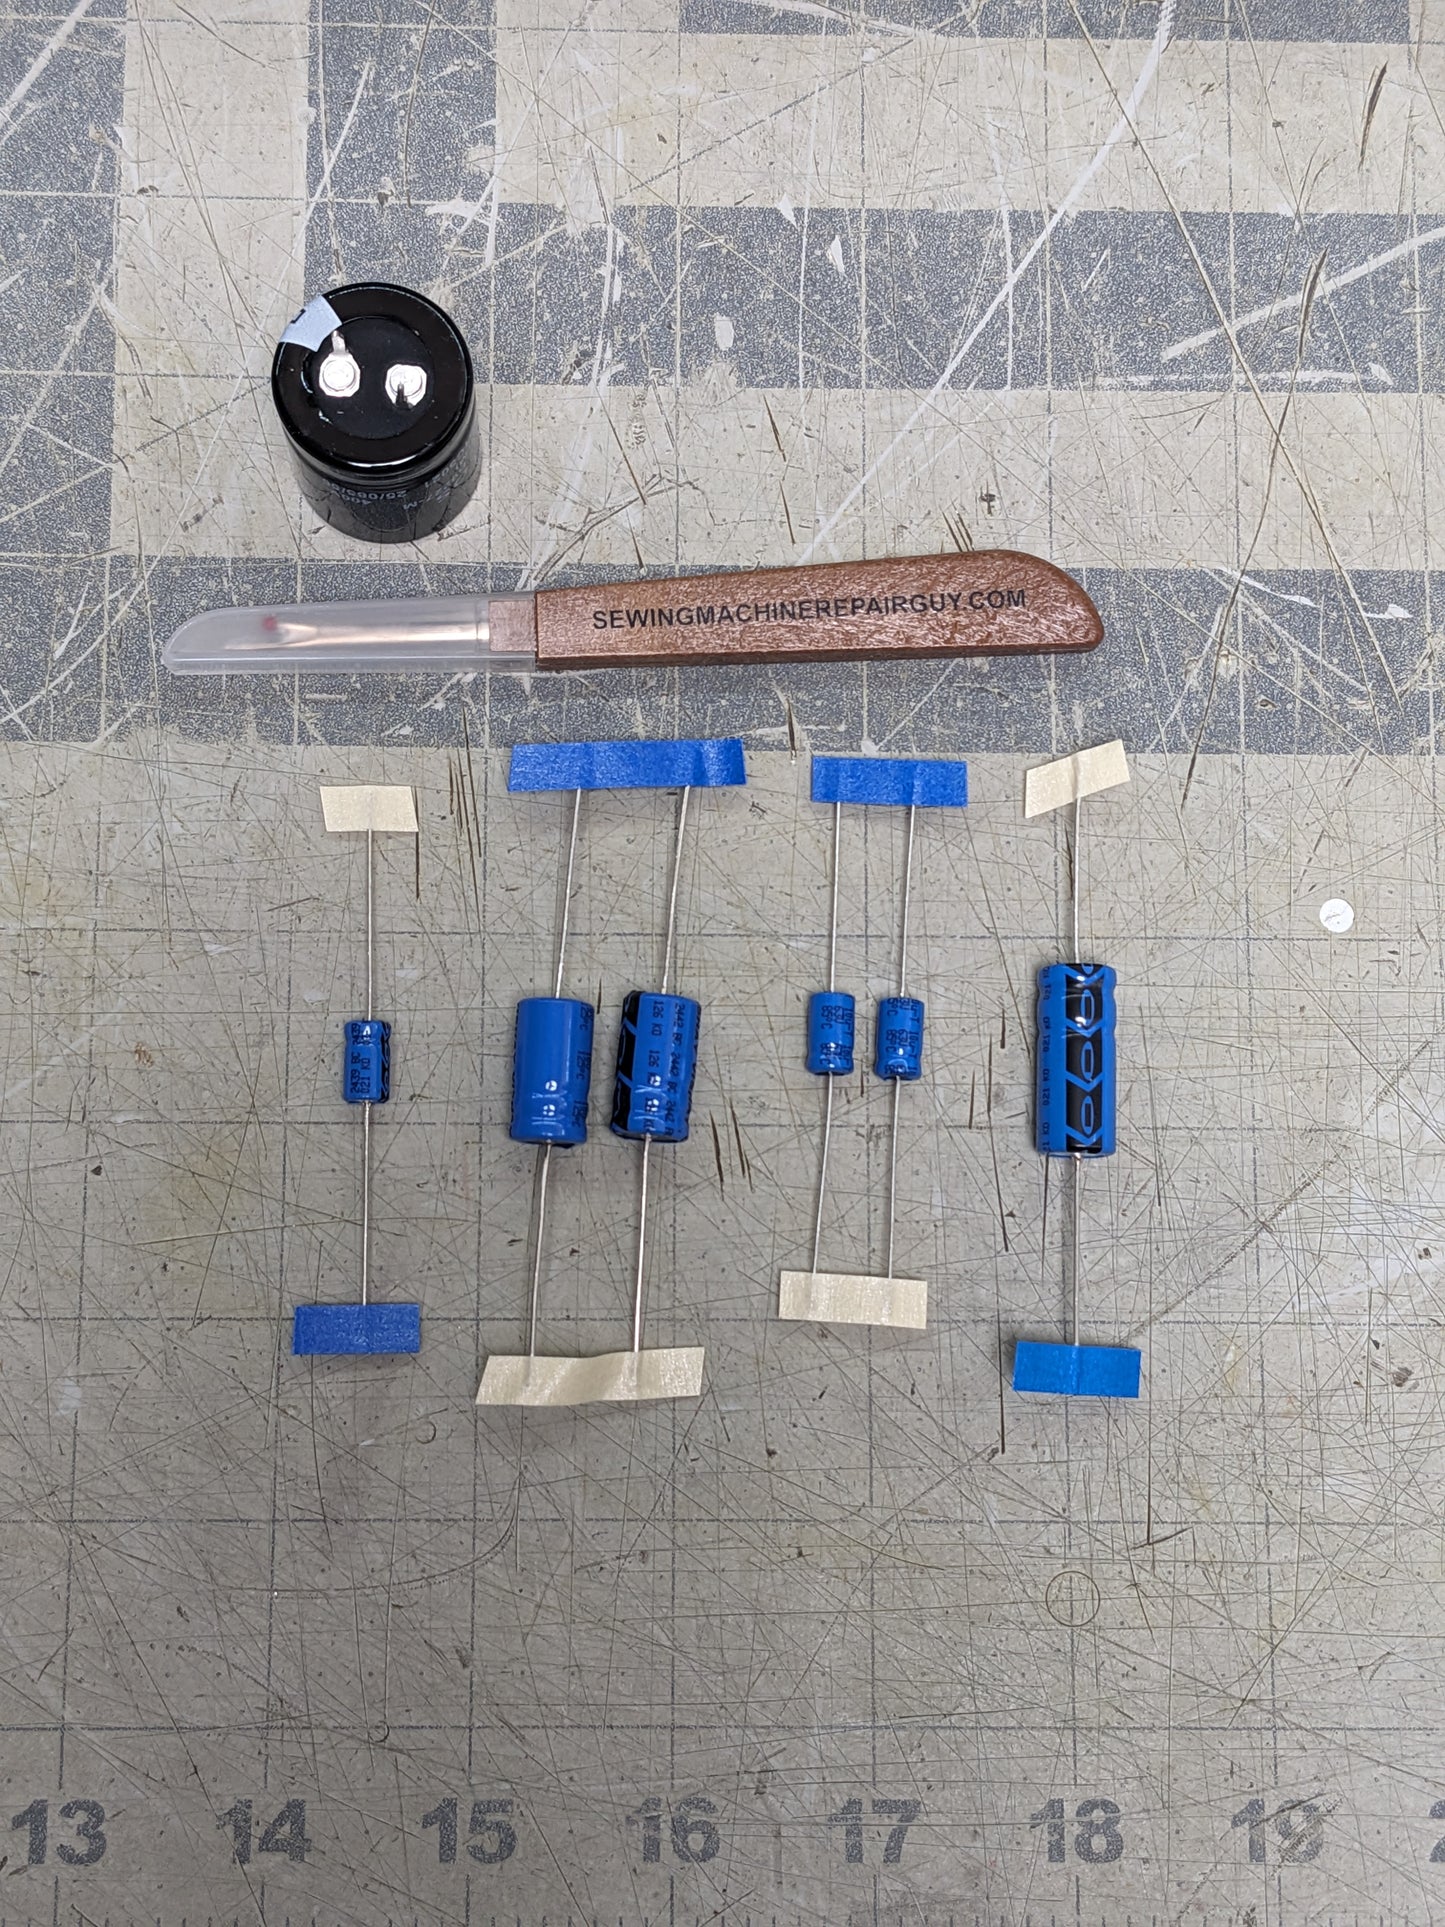
Husqvarna Viking Designer SE Capacitor Repair Kit (Full kit, 7 Included)
Husqvarna Viking Designer SE Capacitor Repair Kit (Full kit, 7 Included)
Couldn't load pickup availability
Husqvarna Viking Designer SE Capacitor Kit 7 included. I have changed how I sell these kits due to lessons learned from 100's of past customers. Condition is New. Picture is of one kit, there are multiple available. You may not get the pictured kit, but all capacitors are included and properly rated for the Husqvarna Viking Designer SE. These will not work for any other sewing machine. Husqvarna Viking Designer SE ONLY!
Why does your kit only have 7 capacitors? I answered that question in this video: https://youtu.be/0JOUlZtN5Uc
How do I replace them? I have a video for that too: https://youtu.be/j4g1zzDY4U8
This kit contains all 6 capacitors for the main board and 1 capacitor for the power supply. I have removed 5 capacitors from the kit that never fail and cause a majority of issues with the repair. If you want the remaining capacitors, they are available separately.
I will include links to a video showing how to replace these. Also, will include link to my website with more information to assist in replacement. As well as my personal contact information if you have any issues with the installation.
These are all new capacitors, never used. No Returns.


The parts along with the video instructions worked beautifully. My brother, the technician, needed someone to help hold the mother board while he did the soldering, but otherwise he had what he needed. He also had several Navy schools a number of years ago that gave him a good background in electronics repairs. He repaired two machines and it took about 60-90 minutes for each. The instructions in the package reduced troubleshooting time, since Wes focused on the most likely causes of the "flashing light of death" symptom. Thank you for all your help!
When the blinky lights of death started on our SE your website was the one that explained what needed to fix the problem. I watched all your videos and convinced myself I could do this. Ordered your kit, followed the videos, soldered the capacitors including the one on the power board (top of cap was puffed) and put it all back together in less than 4 hours. Great hints all along. I did use three wraps of 3/4” painters tape to secure the needle threader to hold it while I removed the front cover. Didn’t have enough hands to keep out of the way. Thanks for sharing.
A bit of a learning curve, but worked like a charm and the machines fixed!!!
My wife did the repair herself and at 80 she did a wonderful job.
Thanks to your kit and your videos on YouTube.
Fast service. Great info. Thanks again!